Looking for Big Green Egg assembly instructions, especially the tricky Big Green Egg hinge assembly instructions? Please, let me help you, having been through the Big Green Egg assembly process and lamenting the poor black and white printed assembly instructions, and even more so the 10x speed Big Green Egg assembly video! What was that about?
The First Thing To Do When You Receive Your Big Green Egg
 The Big Green Egg comes with a warning when you purchase it, and in my case, when it arrived, that you cannot sign for the Big Green Egg unless you unpack it all. If you do, they will not guarantee to rectify any damage.
When you are spending several thousand on a bbq, you don’t want to end up having to pay twice because of damage to your giant gree new family member in transit.
I was hesitant about this, but the sheer outlay meant that I asked the driver if he would mind waiting. Here is the good part; because he normally delivers to commercial premises, he was completely used to this (Big Green Egg use a commercial pallet company for delivery), so this made me much more relaxed.
I made him a cup of coffee, then once I had stripped the cellophane from around the entire package, it was easy to quickly look at all of the accessories, from the pizza stone to the integrated nest and shelves and the eggspander 5 piece kit for my XL Big Green Egg.
I checked all the minor accessories quickly then came to the Big Green Egg XL itself (the fun part).
Basically, I pulled down two sides of the box, which then allowed me to lift off the Big Green Egg lid (not too heavy) and then look around the main shell of the Big Green Egg.
All was absolutely golden, so now we had some chit chat to fill with the delivery driver whilst he finished his coffee, but he was a really sound guy so that was very easy, although I was of course itching to get on with the Egg Assembly.
So, let’s move on to that part.
Big Green Egg Assembly Instructions Part 1
The Big Green Egg is heavy and delivered on a pallet. The delivery driver dropped it on my drive as I soon realised the pallet would not fit through my gate, so my carefully considered plans of assembling the Big Green Egg on the back lawn which was nice and soft had to be changed to assembling it on the drive, which was nice and hard.
So I realised that I needed to build the Integrated nest & shelves XLarge first, so that I could then pop the Big Green Egg on and wheel it into my back garden/yard.
There were no issues at all in assembling the Integgrated nest & shelves XLarge – the instructions were incredibly easy.
Just remember when putting the middle section in, which connects the four legs together, that you need to do the top and the bottom at the same time, otherwise you have to take off the legs you have connected on level one and start again (as I did).
The only other thing is to ensure that you build the Integrated nest & shelves XLarge on some cardboard (plenty of that comes with the Egg) or polystyrene (and that) so that you do not scratch the paintwork (yep, did that too, but its nominal – if I can save you from that though all is good).
Big Green Egg Assembly Instructions Part 2 – Attaching The Lid To The Big Green Egg
Once the nest was ready, I decided, due to the weight of both parts together, it would make much more sense to add the bottom of the Big Green Egg and attach that to the Integrated nest & shelves XLarge BEFORE putting the lid on the Big Green Egg.
However, when I tried to lift the XL Big Green Egg first, I still had the bottom components in, it was heavy.
I decided to be sensible (unusual for me, but the cost made it seem a good idea) and remove everything from inside the Big Green Egg, which then made it so much easier to lift alone.
Be very careful when emptying the two rings from the bottom of the Egg as I am reliably informed they can easily break. I placed mine on the cardboard and polystyrene provided in abundance with the Egg (good for me, the planet maybe not so much).
Once I had lifted the base of the Egg onto the Nest, the first thing I did was attach the bolts as shown below! I did not want it rolling off (unlikely because of the weight). I didn’t fully tighten them as I knew I would have to take them off again once the lid was attached but finger tight so that the Egg would not roll off anywhere….
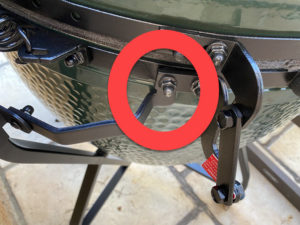
Big Green Egg Assembly Instructions Part 3 – Attaching The Big Green Egg Lid Assembly Instructions
Once the Egg was safely nestled onto the integrated nest, it was time to attach the lid.
This was another area where the Big Green Egg Assembly Instructions left a lot to be desired. If you watch the video, which seems to be at x 100 speed for some reason, it is nigh on impossible to see which bits go where.
I had to actually freeze frame the video, take a screen shot then zoom in to have a vague idea of what should go where, so I hope the images below make it easier for you to do this.
First, take off all of the bolt heads around the Egg and put them somewhere safe (I used one of the many plastic bags that came with the Egg).
Then, attach the two main hinges, as shown below:
Big Green Egg XL Right Side side hinge (as you look at it from the front):
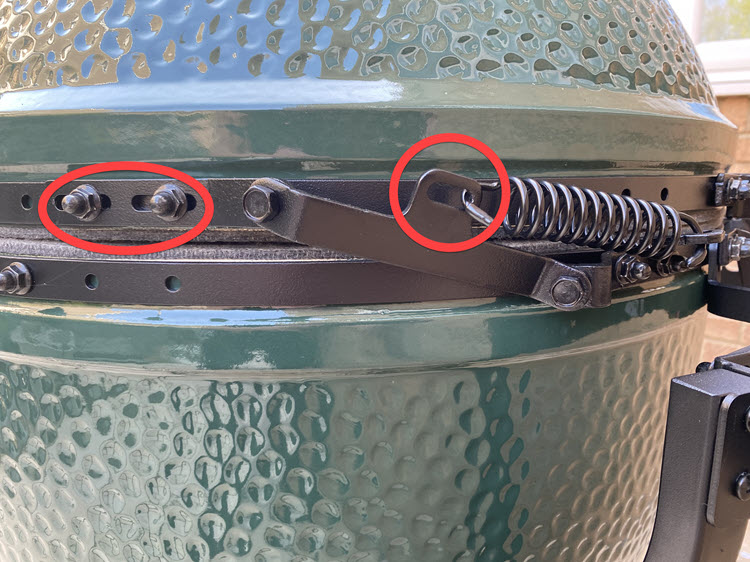
Big Green Egg XL left Side side hinge (as you look at it from the front):
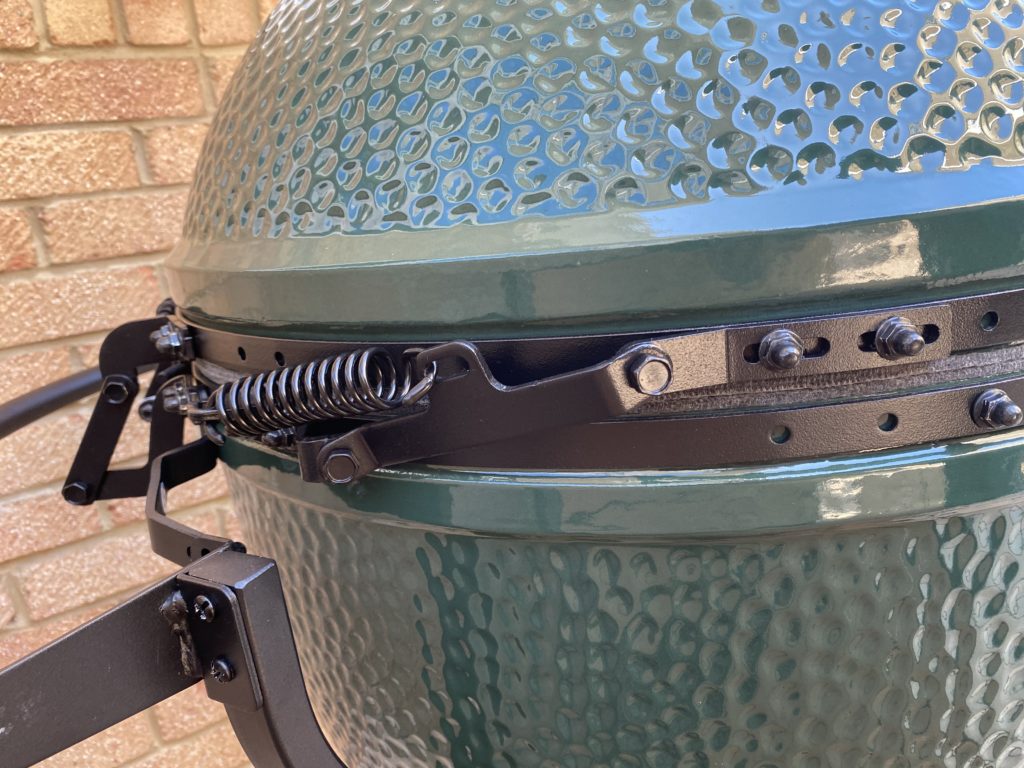
Once you have attached the side hinges, it is time to add the back hinges.
The one with the piece of red card (leave that in) goes on the back right as you look from the front, the other on the back left.
Once again, the Big Green Egg Assembly Instructions were far from adequate, so here is a picture of each hinge in situ for you to copy:
Back right rear hinge:
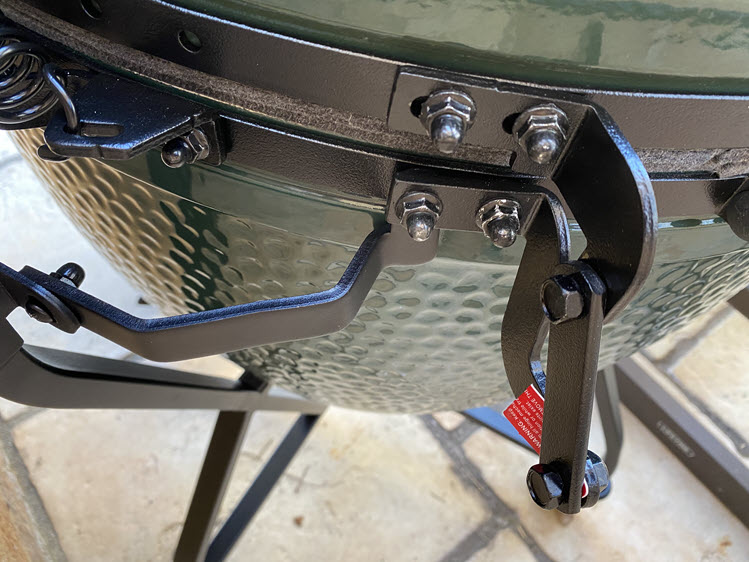
Rear Left Hinge Assembly:
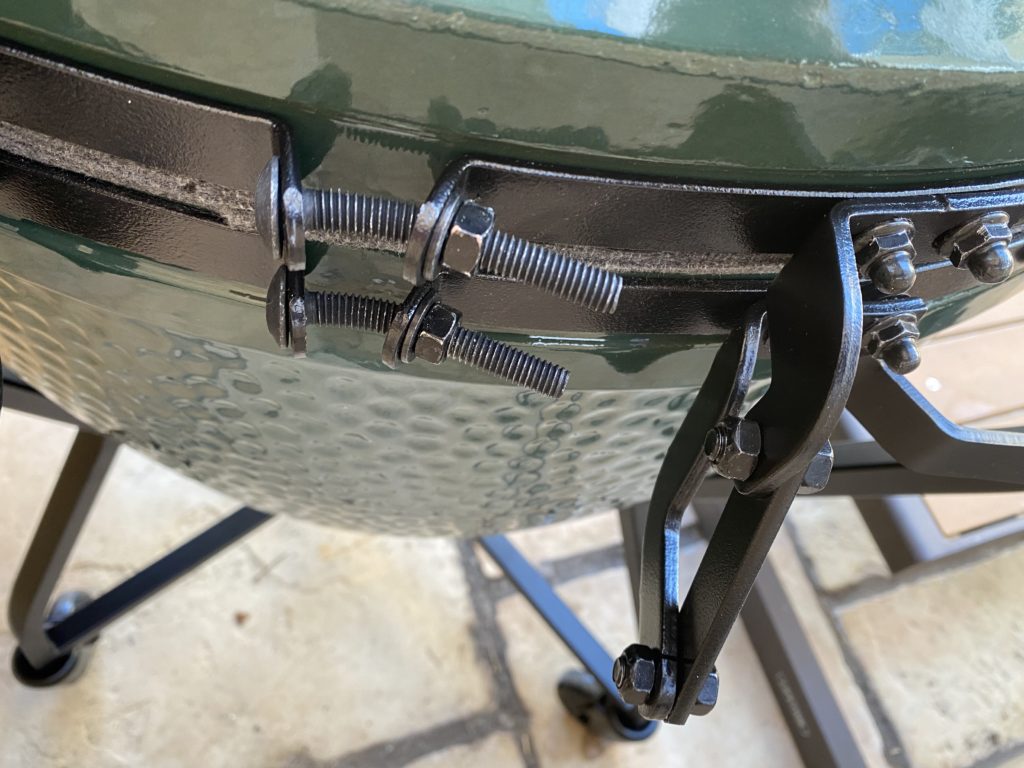
Finally, add the handle to the front, then you can tighten all of the nuts and screw the remaining nuts onto the spare threads (which are for things like shelves and other accessories).
Big Green Egg Assembly Instructions Part 5 – Attaching The Springs
You are now nearly there!
All you need to do is to slowly lift the lid and attach the springs (we added them with the green part facing into the egg).
You can see a close up of the hinge above (the hook facing down, green side into the egg).
Once you have added both, add the supplied caps to each top and you are done!
Finally, whack the Reggulator on the very top of the dome (lining it up so that it faces forwards when fully shut) and move your Egg into its final cooking position.
Big Green Egg Assembly Instructions Part 6 – Cooking With The Big Green Egg!
Now the fun can begin.
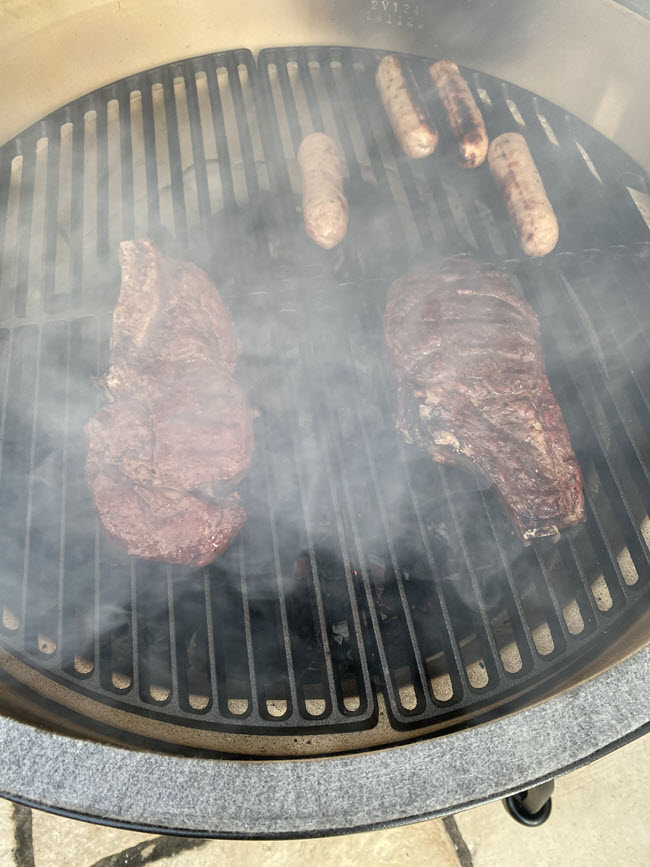
Yes, the egg really does light up in no time at all, all you need is one Big Green Egg lighter and some of the high quality Big Green Egg Lumpwood Charcoal (never briquettes) as shown below, leave everything open for 10 minutes until the coal in the middle has taken, then shut the lid leaving the bottom vents (both of them) and the top Reggulator fully open, get the Egg up to the temperature you require, then, after burping it (lifting the lid and closing it 2/3 times) add your cooking surfaces of choice (Conveggtor or Ceramic Grate or Stainless Steel cooking grid. Shut the lid again until you hit your temperature, then burp, add food, shut lid, keep a check on the temperature and wait for perfect food!
More On The Big Green Egg
You might also like some of our other Big Green Egg guides and recipes.
[widget id=”text-8″]


